 Ultimate guide
Professional Brass Instrument Setup Guide
Table of Contents
- Understanding Professional Brass Instrument Setup
- The Brass Instrument Setup Checklist: What to Inspect Before Playing
- How to Clean a Brass Instrument Properly
- Essential Brass Instrument Repair Tools and Equipment
- When to Seek Brass Instrument Professional Servicing
- Common Setup Mistakes to Avoid
- Frequently Asked Questions
Last Updated: October 5, 2026
Understanding Professional Brass Instrument Setup
A professional brass instrument setup refers to the complete preparation and calibration of a brass instrument to ensure optimal playability, intonation, and longevity. This includes inspecting all mechanical components, cleaning internal and external surfaces, adjusting valves and slides for smooth operation, and addressing any wear or damage before the instrument is played.
At Hayes Music, we understand that many musicians receive instruments, whether new purchases or inherited pieces, that haven't been properly prepared. An instrument straight from the box or storage may have stiff valves, sluggish slides, or accumulated dust that affects tone quality.
The difference between playing an instrument that's been properly set up and one that hasn't is immediately noticeable. Valves respond faster, slides move smoothly, and the overall playing experience becomes more enjoyable. For beginners especially, starting with a well-prepared instrument builds confidence and removes unnecessary frustration. For professionals, regular setup checks maintain the reliability that gigging demands.
The Brass Instrument Setup Checklist: What to Inspect Before Playing
Before playing any brass instrument, a systematic inspection catches problems early and prevents damage during use. This checklist covers the essential checks that form the foundation of a proper professional brass instrument setup.
Visual and Physical Inspection
Start with a thorough visual examination of the entire instrument. Hold it up to natural light and inspect the tubing for dents, cracks, or evidence of previous repair work.
Check the valves and slides for visible corrosion, tarnish, or green oxidation. Some discolouration is normal, but heavy corrosion indicates the instrument has been stored in damp conditions and may require professional cleaning.
Inspect the valve casings and slide tubes for straightness. Gently sight along the length of each valve slide to ensure it hasn't been bent. Bent slides won't retract fully and create tuning problems. Check that all valve caps, water keys, and trim pieces are present and secure.
Look at the mouthpiece for damage or heavy wear. A damaged mouthpiece rim affects tone quality and comfort, and replacement is usually necessary. Check that the mouthpiece seats firmly in the lead pipe without gaps or wobbling.
Valve and Slide Functionality
Test each valve individually by pressing it slowly and listening for smooth, quiet operation. A valve that sticks, makes grinding noises, or requires excessive force to move indicates internal corrosion or misalignment. Similarly, each slide should move freely without resistance or grinding sounds.
Press each valve all the way down and release it several times. The valve should return to its resting position smoothly and quickly. Slow return suggests worn valve springs or internal wear.
For rotary valves (common on French horns and some tubas), rotate each valve smoothly through its full range. The rotation should be fluid and consistent, with no sticking points. Check that the rotor returns to its starting position when released.
Test the water keys (the small drains on valve slides and the main tubing) by opening each one. They should open and close easily without leaking or sticking. A stuck water key suggests corrosion inside the mechanism.
How to Clean a Brass Instrument Properly
Regular cleaning is essential for maintaining the playability and appearance of a brass instrument. A consistent routine prevents buildup that leads to sticking valves, sluggish slides, and deteriorating tone quality.
Routine Daily Cleaning
After each playing session, perform basic maintenance to remove moisture and debris. Empty the water key (or keys) by opening it fully and allowing any accumulated moisture to drain.
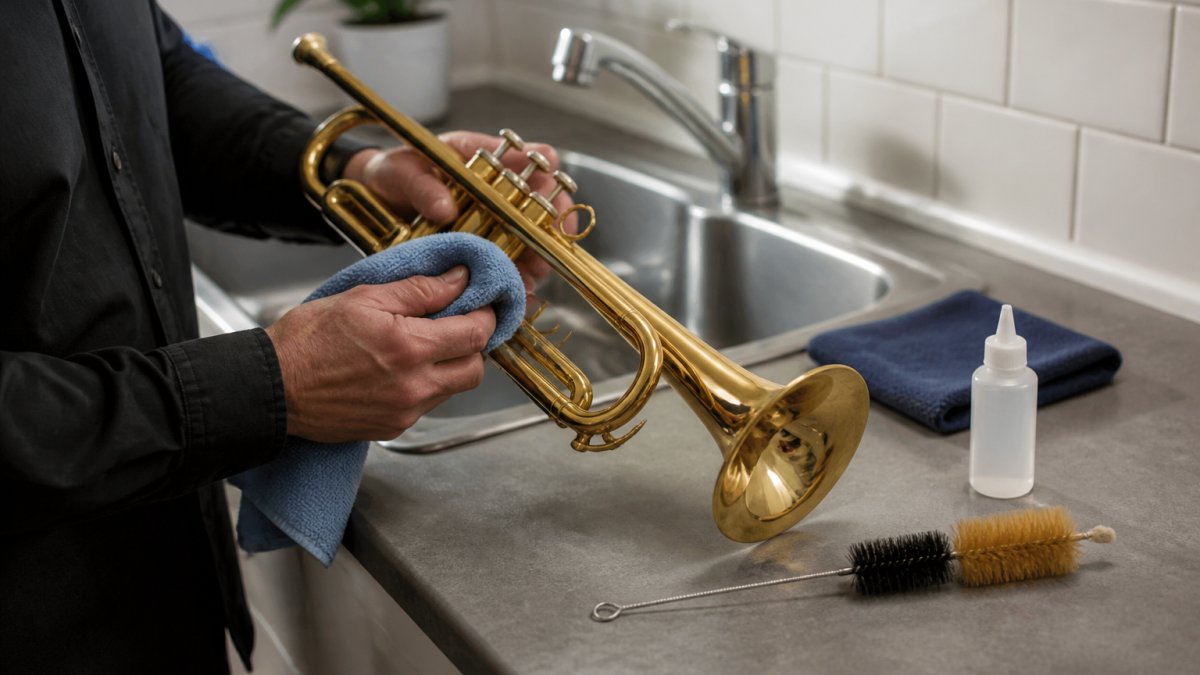
Wipe down the exterior of the instrument with a soft, dry cloth. This removes fingerprints, dust, and any moisture from your hands. Pay particular attention to valve casings and the areas around slides, where moisture accumulates.
For valve instruments, press each valve down gently several times without blowing air through the instrument. This distributes any residual moisture inside the valve casings and helps prevent corrosion.
Store the instrument in its case in a dry location. Never leave it sitting out on a music stand or windowsill, where temperature and humidity fluctuations can cause damage.
Deep Cleaning and Maintenance
Deep cleaning should occur every 3-6 months for regular players and annually for casual players. This process removes internal buildup that daily cleaning cannot address.
For a thorough clean, disassemble the instrument according to its design. Trombone players remove the inner and outer slides. French horn and tuba players typically need professional assistance for disassembly.
Soak valve slides and tubing sections in warm (not hot) water for 15-20 minutes to loosen debris. Use a soft brush or valve cleaning rod to gently remove buildup from inside the tubing.
For the valve casings, use a valve cleaning rod with a soft cloth wrapped around it. Insert the rod gently into the valve casing and rotate it slowly to remove any corrosion or debris.
After cleaning, dry all components thoroughly with a soft cloth. Reassemble the instrument carefully, ensuring all components seat properly. Apply a small amount of valve oil to each valve to restore smooth operation.
Essential Brass Instrument Repair Tools and Equipment
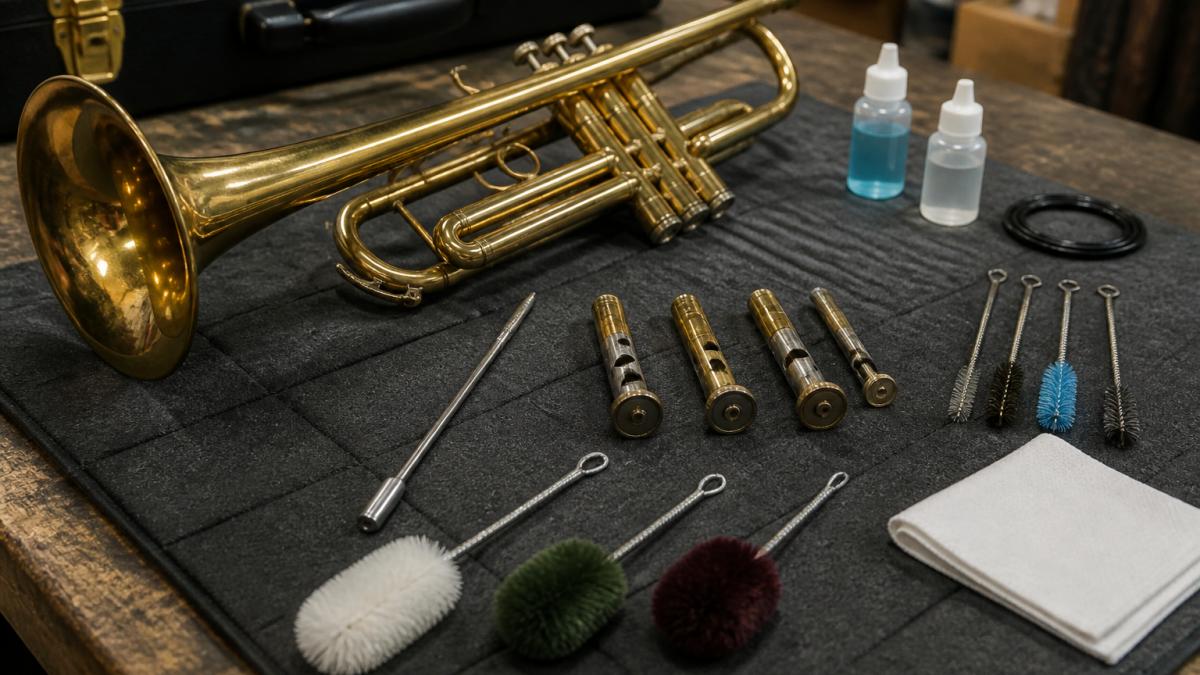
Maintaining a brass instrument setup at home requires only a few essential tools.
A valve cleaning rod is fundamental. This long, thin rod with a handle allows you to clean inside valve casings without disassembling them completely.
A soft brass brush is used to gently clean tubing interiors and remove loose debris. The soft bristles won't scratch or damage the interior finish.
Valve oil is essential for smooth valve operation. Quality valve oil reduces friction and protects against corrosion.
Slide grease serves the same protective function for slides and rotary valves.
A soft, lint-free cloth is used for drying and polishing. Microfibre cloths are ideal because they don't leave fibres behind.
A water key brush is a thin, soft brush designed specifically for cleaning the internal mechanism of water keys.
For more advanced maintenance, a tuning slide puller helps remove stuck slides without applying excessive force that could bend the tubing.
When to Seek Brass Instrument Professional Servicing
Some maintenance tasks require professional expertise and equipment beyond what most musicians can perform at home. Recognising when to seek professional help prevents further damage and ensures the instrument receives proper care.
Signs Your Instrument Needs Professional Attention
Sticking valves that don't respond to home cleaning indicate internal corrosion or wear that requires professional valve servicing. A technician can disassemble the valve, clean internal components, and replace worn seals or springs.
Sluggish slides that move slowly or unevenly despite lubrication suggest internal corrosion or misalignment. Professional slide servicing involves cleaning the internal slide tubes and adjusting the fit to restore smooth operation.
Visible cracks in the tubing, solder joints, or valve casings require professional repair. Cracks compromise the structural integrity of the instrument and affect tone quality.
Leaks, whether from valve casings, slide joints, or water keys, indicate worn seals or internal corrosion. A professional can identify the source of the leak and replace seals or repair the affected component.
Dents that distort the tubing's shape affect airflow and intonation. While cosmetic dents don't require attention, dents that change the tubing's diameter should be professionally removed using specialised dent removal tools.
Scheduled Servicing and Overhauls
Professional musicians typically schedule servicing annually or every 18 months, depending on playing frequency and intensity. A full overhaul, a comprehensive servicing that includes valve and slide servicing, deep cleaning, and inspection of all components, is recommended every 3-5 years for regular players.
Hayes Music provides comprehensive servicing for brass and woodwind instruments. Our technicians inspect every component, address any wear or damage, and return your instrument in optimal playing condition.
During a professional overhaul, technicians disassemble the entire instrument, clean all internal and external surfaces, replace worn seals and springs, and reassemble everything with precision. This process restores an instrument to near-original condition and extends its playable lifespan significantly.
Common Setup Mistakes to Avoid
Understanding common mistakes helps you maintain your instrument properly and avoid costly repairs.
Applying excessive force to stuck valves or slides is the most damaging mistake. Many musicians attempt to force movement, thinking persistence will loosen the component.
Neglecting water key drainage is surprisingly common. Musicians forget to open water keys after playing, allowing moisture to accumulate inside the tubing.
Using incorrect lubricants, such as general machine oil instead of valve oil, or cooking oil instead of slide grease, causes buildup and attracts dust.
Storing instruments in damp environments accelerates corrosion. Basements, attics, and garages that experience humidity fluctuations are poor storage locations. A climate-controlled room or case with moisture-absorbing packets is ideal.
Attempting professional repairs without proper training can cause more damage than the original problem.
Maintaining a professional brass instrument setup ensures your instrument responds reliably and sounds its best.
Frequently Asked Questions
How do you set up a brass instrument before playing?
Before playing, inspect your brass instrument for visible damage, ensure all valves move smoothly, and check that slides operate freely without sticking. Apply valve oil to valves if needed, wipe the mouthpiece clean, and test the instrument's response. If anything feels stiff or sounds muted, stop and address the issue before extended playing. Professional setup checks should be done annually by a qualified technician.
What tools do you need to maintain a brass instrument?
Essential brass instrument maintenance tools include a soft cleaning cloth, valve oil, slide grease, a flexible brush for the bore, a snake (cleaning rod with brush), and a mouthpiece brush. For deeper maintenance, you may need a valve casing tool for internal cleaning and specialist lubricants. A music stand and rosin (for some instruments) complete the basic kit. Most of these items are inexpensive and widely available.
How often should a brass instrument be cleaned?
Clean the exterior and mouthpiece daily after playing to remove moisture and saliva residue. Empty water keys after each session. Perform a thorough internal cleaning every 2-4 weeks depending on usage frequency. Professional deep cleaning and servicing should happen annually or every 12-18 months for regular players. Heavy users or professionals may need servicing twice yearly.
When should a brass instrument be taken to a repair technician?
Take your instrument to a professional repair technician if you notice stuck valves that won't move smoothly, dents that affect sound quality, persistent leaks, or slides that stick despite proper lubrication. Also seek professional help for major overhauls, cork or felting replacement, or if home cleaning doesn't resolve performance issues. A qualified technician can diagnose problems that aren't obvious and prevent further damage.
Can you clean a brass instrument at home?
Yes, routine cleaning can be done at home safely. Daily wipe-downs and water key emptying are essential home maintenance. You can also perform gentle internal cleaning with a snake and soft brush. However, avoid aggressive scrubbing, which risks damaging the instrument's finish. For chemical cleaning, valve removal, or deep bore work, professional equipment and expertise are needed to prevent harm.
How do you oil brass instrument valves correctly?
Apply a small amount of valve oil to each valve piston before inserting it into its casing. Depress the valve slowly several times to distribute the oil evenly around the piston. Wipe away excess oil with a clean cloth. Use only brass instrument valve oil, never household oils or grease. Over-oiling causes stickiness; under-oiling causes friction and wear. Replace oil every few weeks or when valves feel sluggish.
What should you check if a brass instrument is not playing properly?
First, check for water in the instrument and empty all water keys. Inspect valves for stiffness and apply fresh valve oil if needed. Look for visible dents or damage to the bore. Test that the mouthpiece is clean and properly seated. Listen for unusual buzzing or muted tones, which may indicate internal blockages. If these steps don't help, the instrument likely needs professional inspection to identify internal wear or damage.